Documentation
CallRouter setup guideInstalling The Plugin
Uploading a plugin to WordPress is a simple task that can significantly enhance your website’s capabilities, and installing the CallRouter plugin is a perfect example of this. CallRouter is a powerful tool specifically designed to streamline the management of your incoming calls and texts.
To get started with CallRouter, first, ensure you have the plugin file downloaded whcih you can find from the download page. The next step involves logging into your WordPress admin dashboard (ensure you are an admin when uploading this plugin).
Once you're in the dashboard, navigate to the "Plugins" section on the left-hand menu and select "Add New." This action opens up the vast world of plugins ready to enhance your site, but what you'll want to do is click on "Upload Plugin" to manually add the CallRouter plugin. After hitting the "Choose File" button, locate the CallRouter plugin ZIP file on your device, select it, and click "Install Now." Once installation is complete, activate the plugin to unlock its full potential. With CallRouter activated, a new era of communication efficiency begins as you access its settings from the dashboard menu.


Twilio Setup
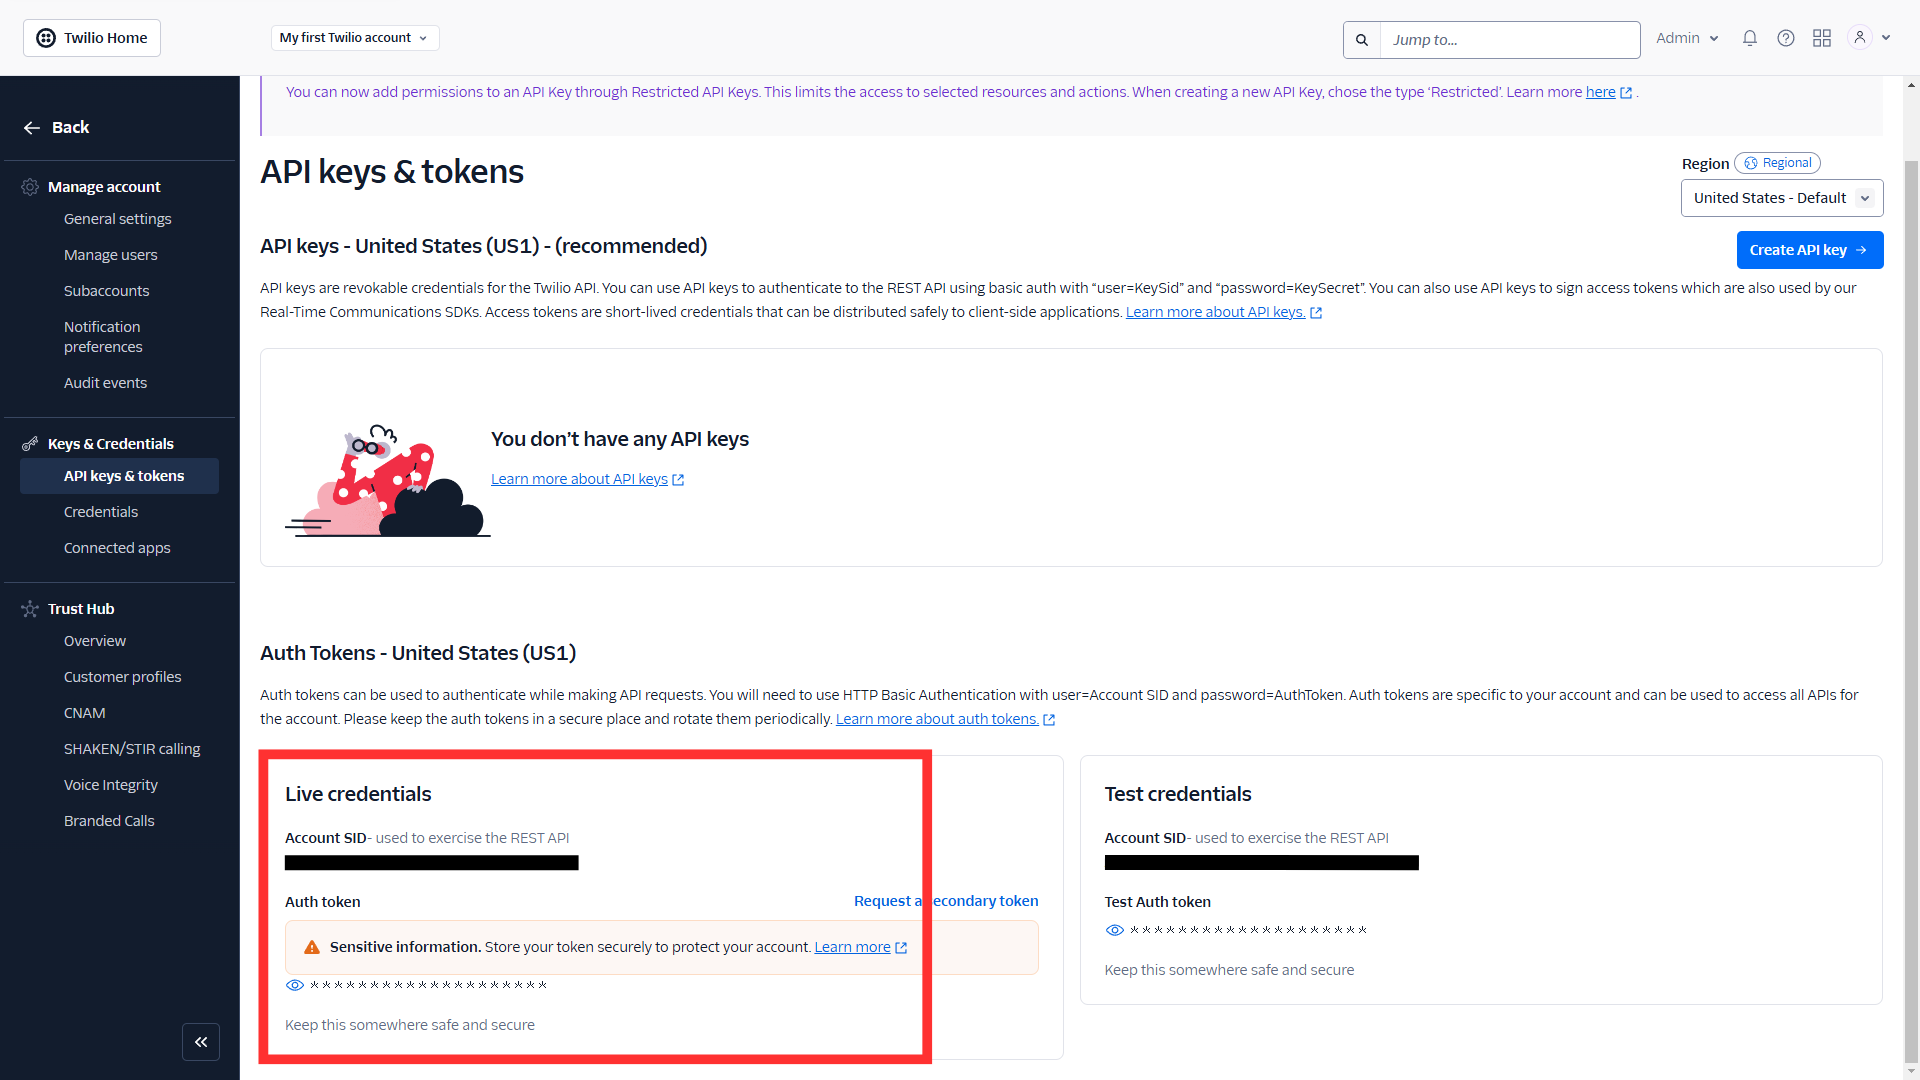
To seamlessly integrate the Twilio API with your CallRouter WordPress plugin, you'll first need to obtain your Twilio API SID and Auth Token. These credentials can be found by logging into your Twilio account and navigating to the Dashboard or by navigating to Keys & Credentials. Here, you’ll see the necessary credentials listed under "Account SID" and "Auth Token." Be sure to handle these credentials with care, as they provide access to your Twilio account and its services.
Since each Twilio Region operates independently of other Regions, Twilio API credentials are a Region-specific resource. This means that any given Auth Token or API Key is only valid for the Twilio Region in which it was created. Make sure you are viewing credentials for the United States. Supported countries for this region is the United States & Canada.
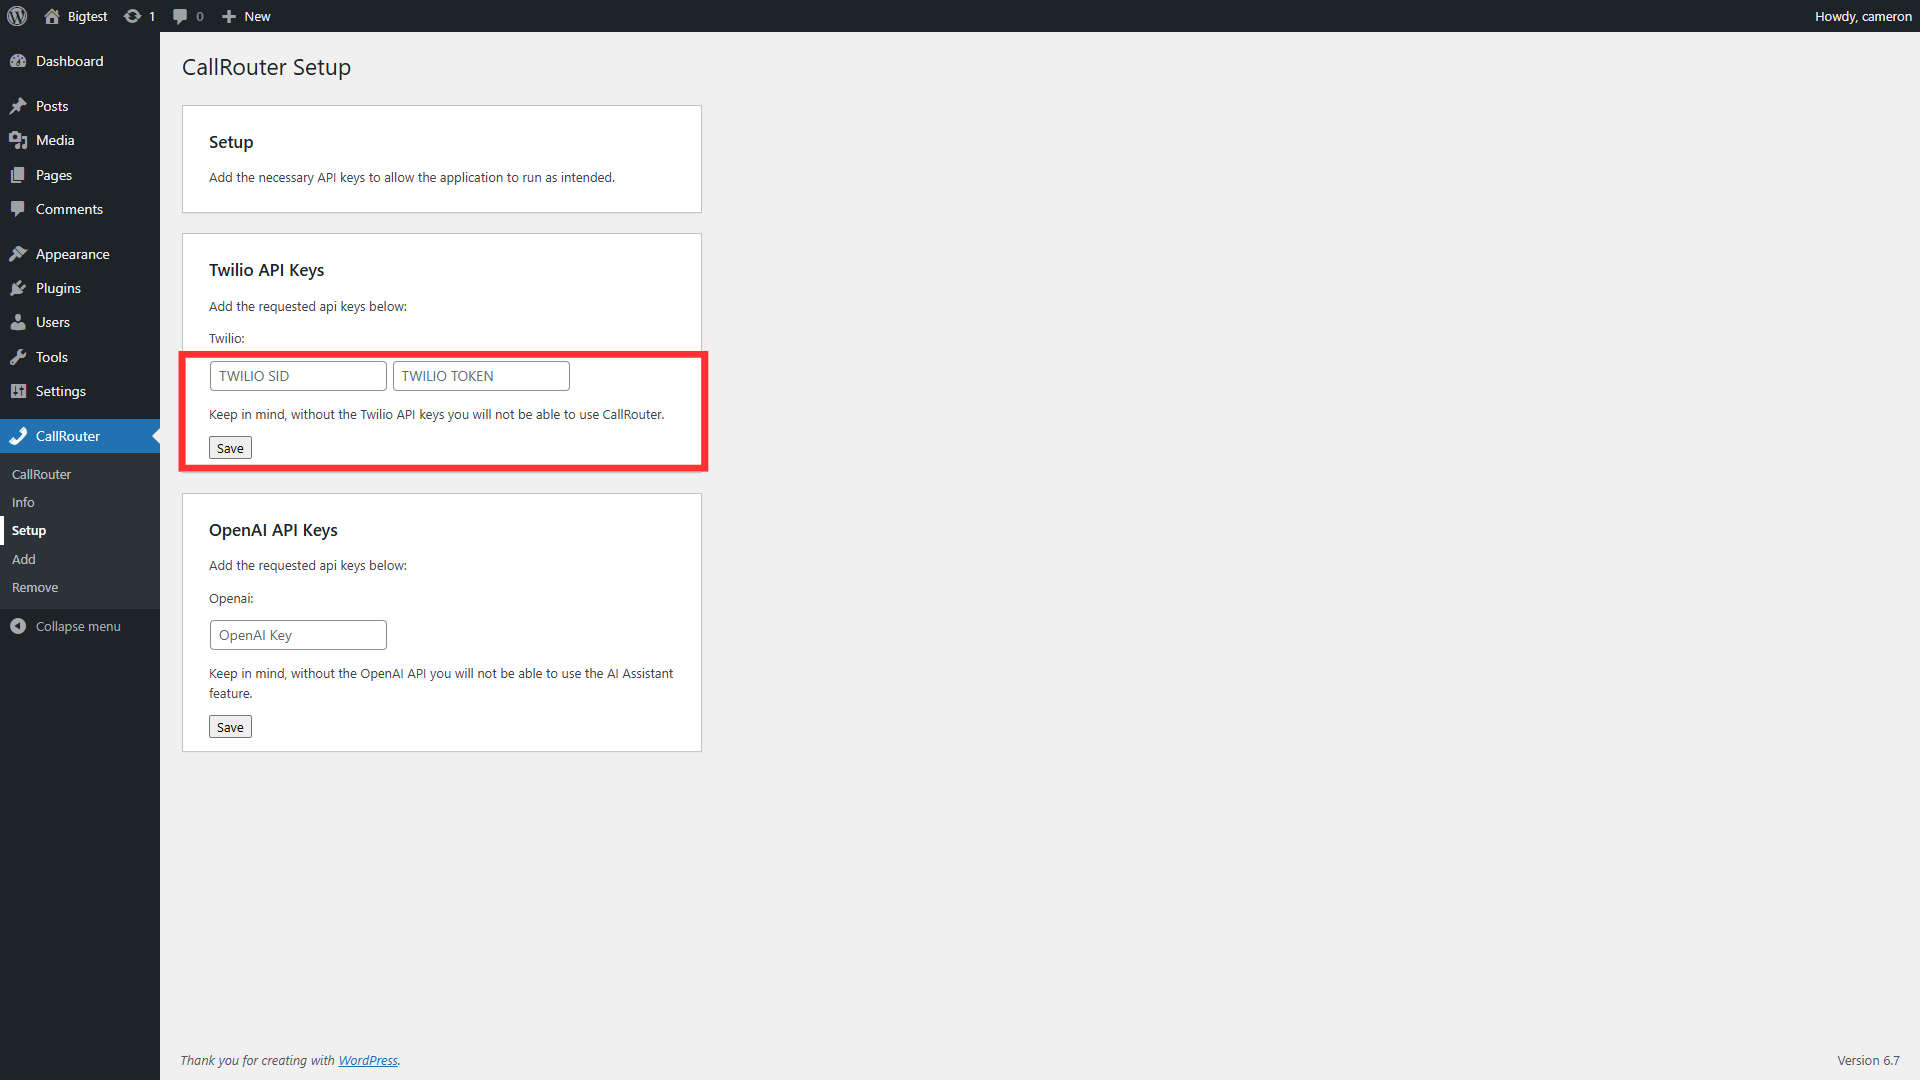
Once you have your SID and Auth Token, log into your WordPress site and navigate to the admin dashboard. From there, locate the CallRouter plugin in the sidebar menu and click on the setup page. Within the setup page, you should find designated fields for entering your Twilio credentials. Carefully input your Twilio API SID and Auth Token into the corresponding fields. Double-check for any typographical errors to ensure a smooth configuration process. After entering your credentials, make sure to save the changes before exiting the page. By doing this, you will have successfully connected your CallRouter plugin to the Twilio API, enabling you to utilize Twilio's powerful communication features seamlessly within your WordPress site.
OpenAI Setup
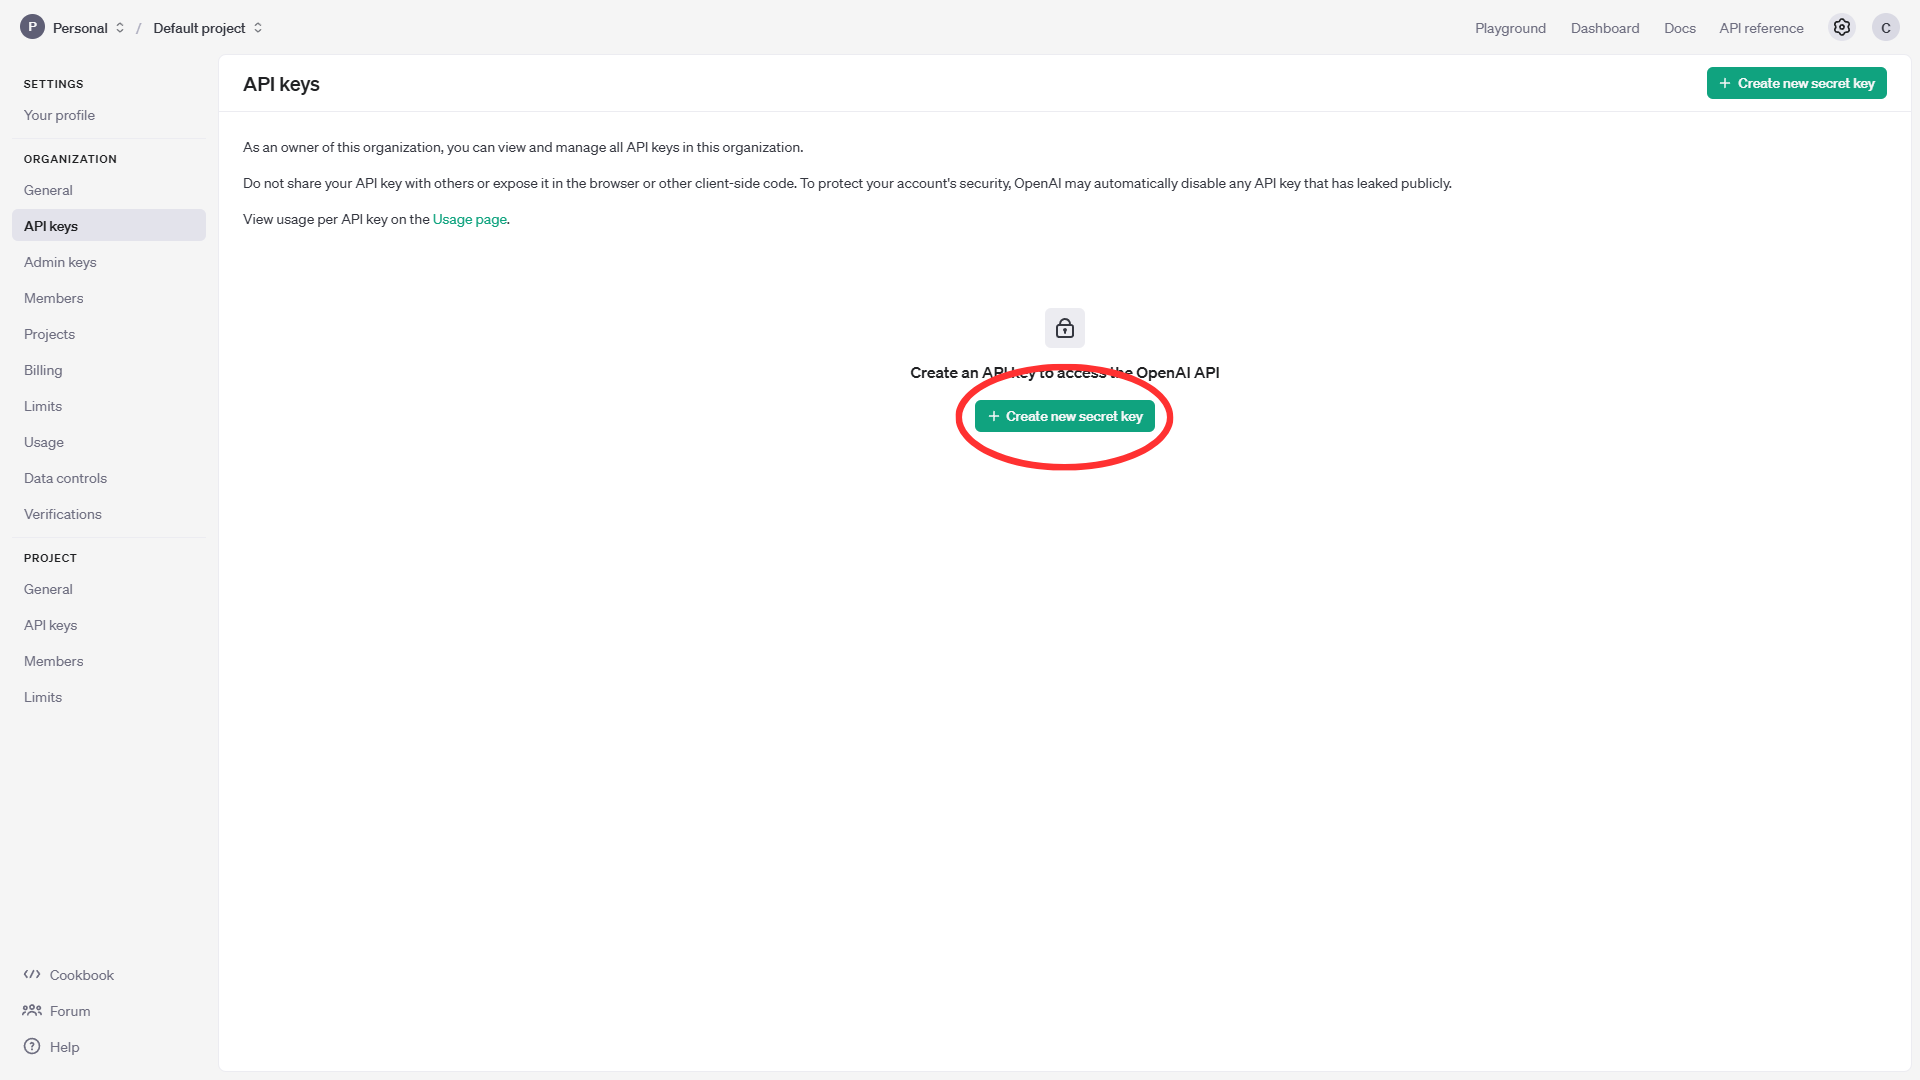
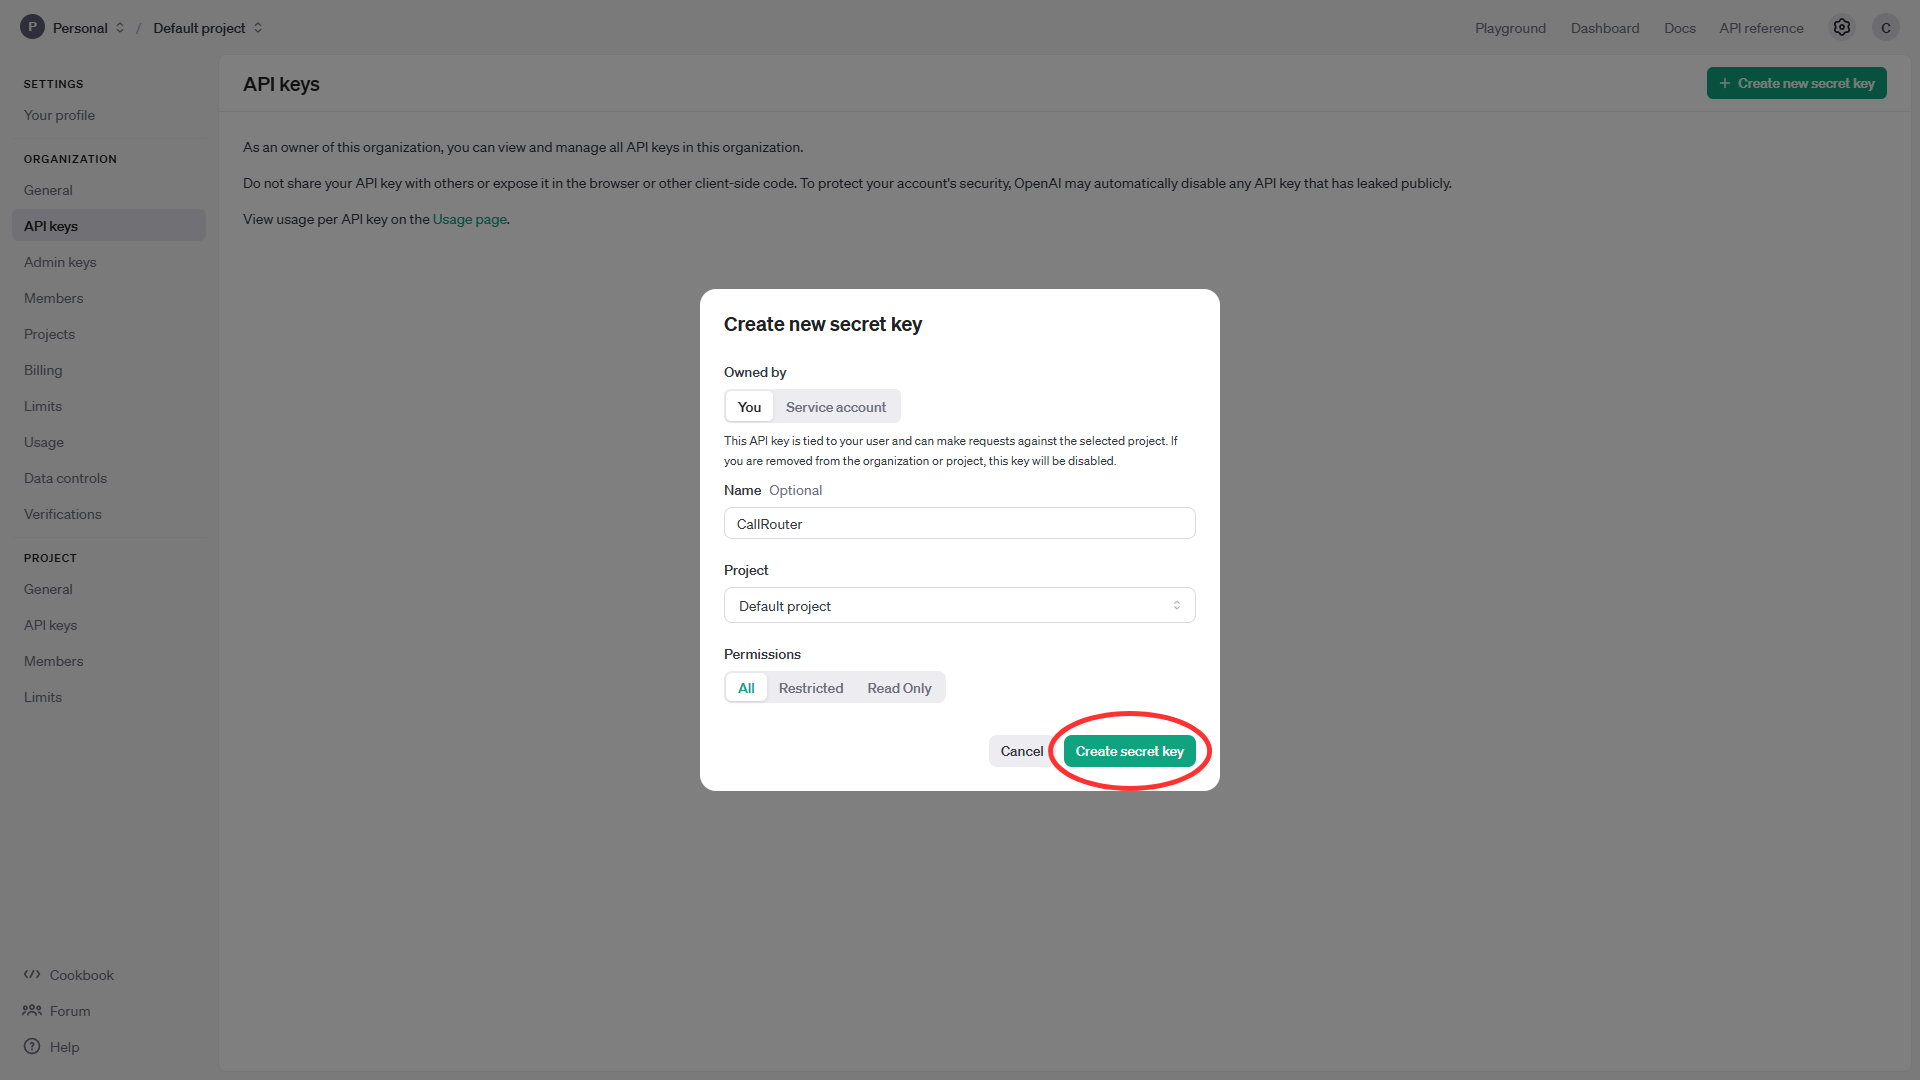
To integrate the OpenAI API key into your CallRouter WordPress plugin, you'll first need to ensure you have the appropriate API key from OpenAI. First navigate to API Keys page inside of your OpenAI account and click on create new secret key.
Fill out the required fields such as the name of the new key and the associated project. Make sure the new API secret key has all permissions selected before continuing.
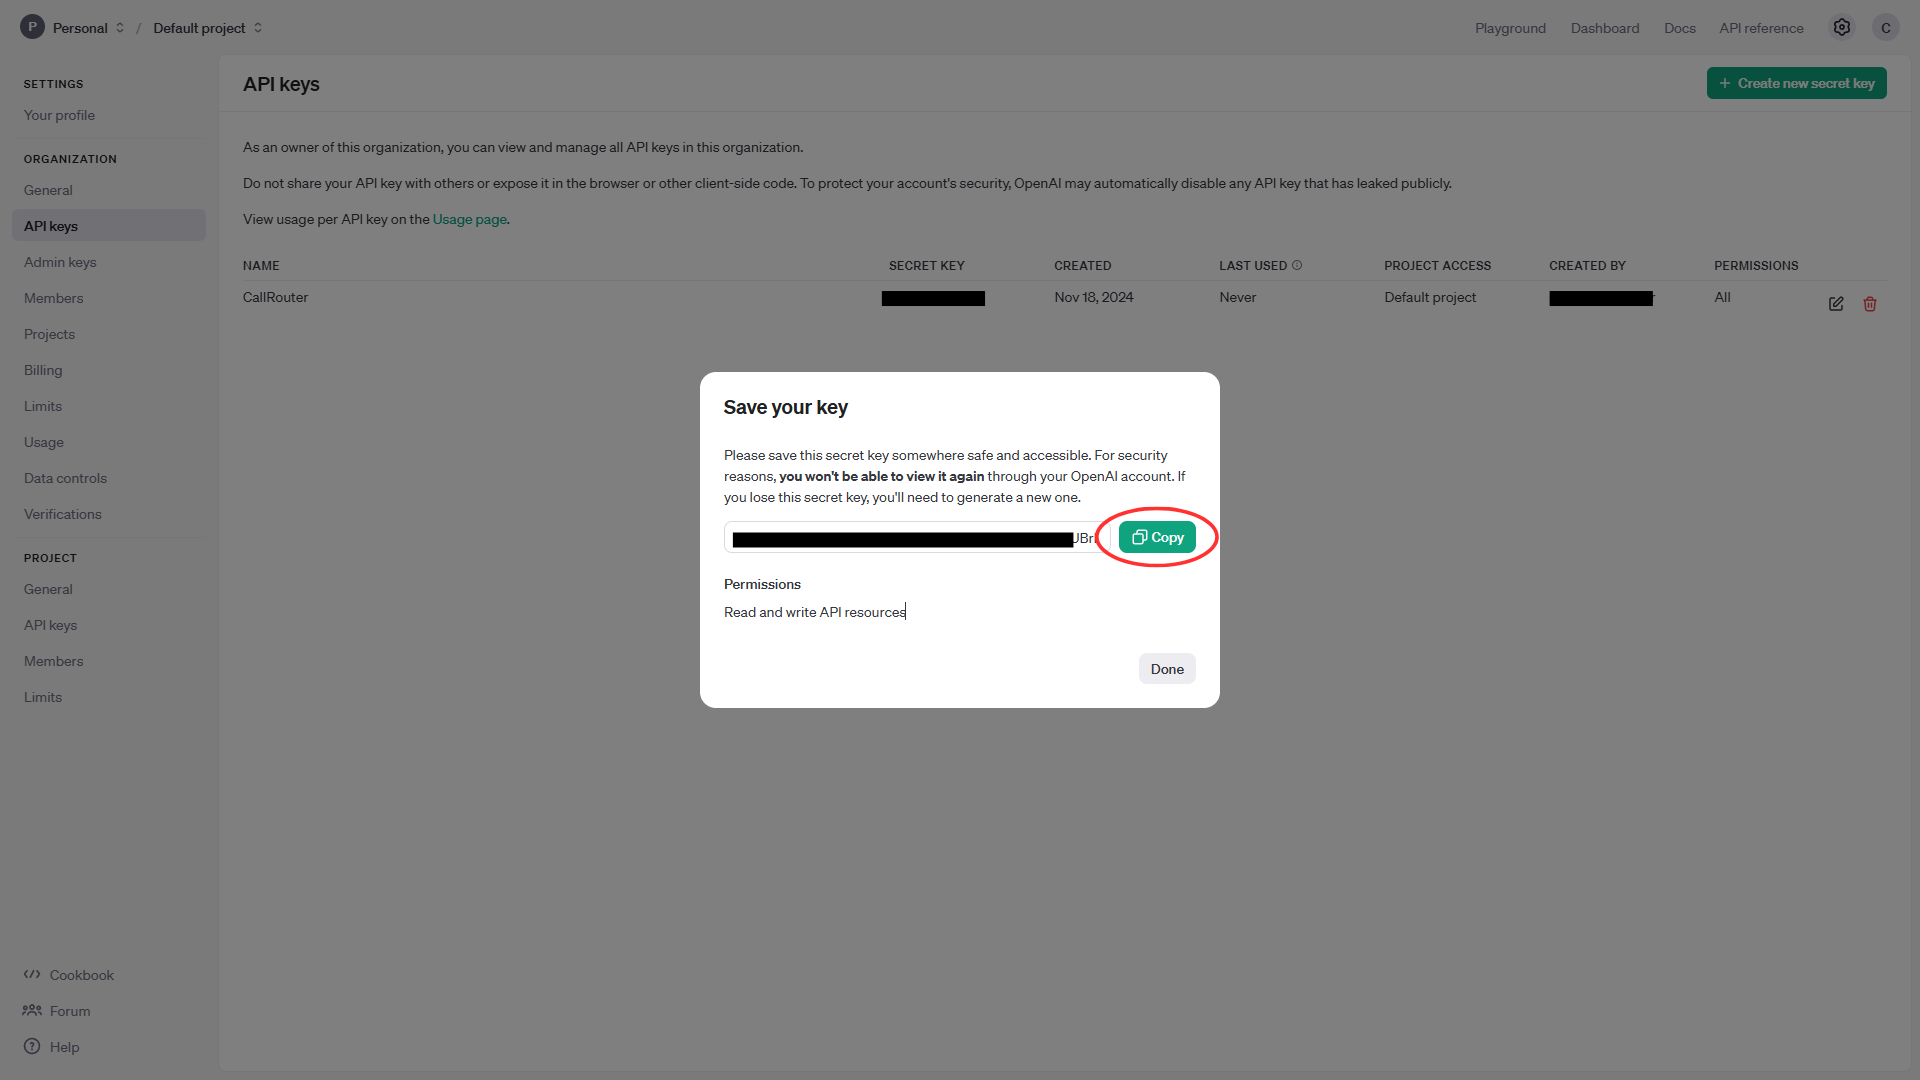
Next copy your newly created OpenAI Secret Key.
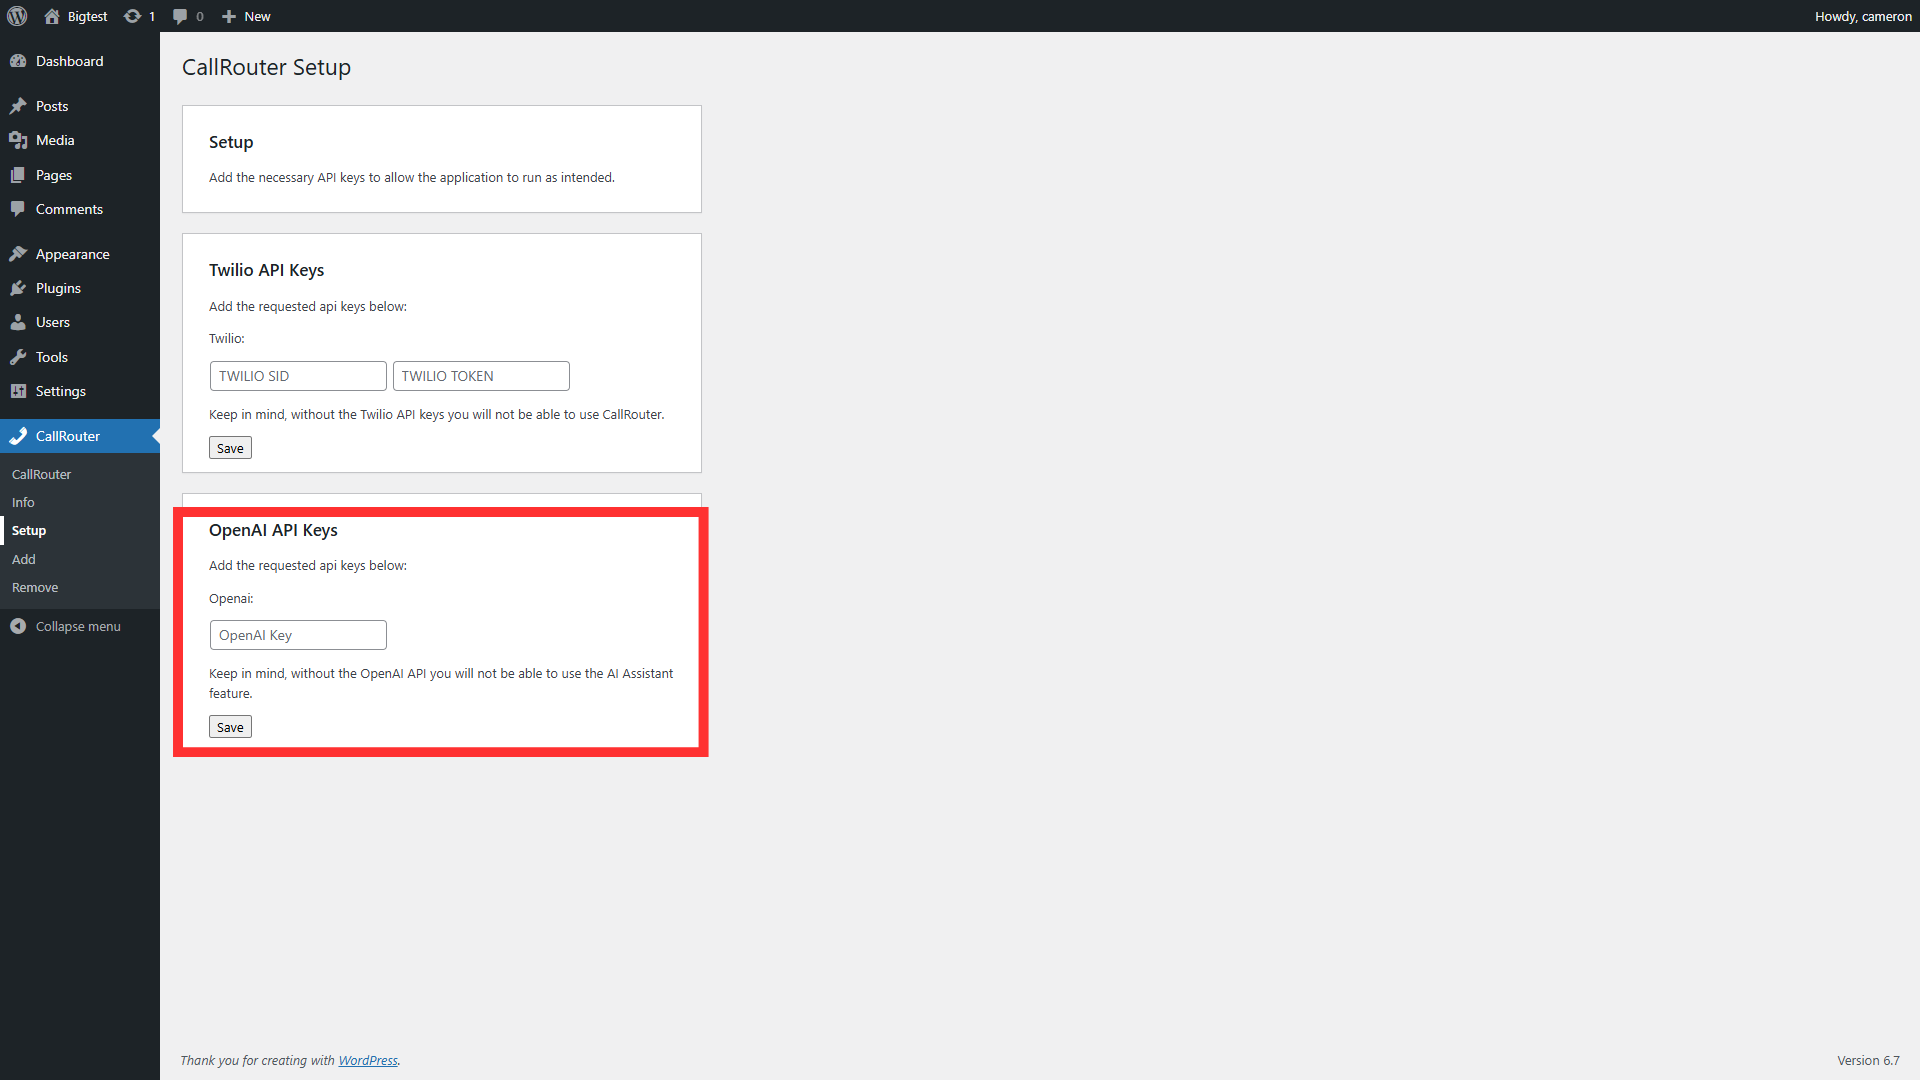
Once you've acquired your API key, navigate to your WordPress dashboard and access the CallRouter plugin. From the plugin's interface, locate the setup page where you'll be able to input necessary credentials. Within the setup page, you should find a dedicated field labeled "OpenAI API Key" or something similar. Carefully input your API key into this field, ensuring there are no leading or trailing spaces that could cause validation errors. After inputting the key, save your changes to confirm the integration. These steps allow the CallRouter plugin to communicate effectively with OpenAI's services, enabling the various functionalities that depend on this API to work seamlessly.
Accessing The CallRouter Dashboard
The CallRouter WordPress plugin employs a nuanced role-based access control system to ensure that only authorized users can interact with its features, particularly the custom dashboard. This dashboard serves as a centralized hub for managing calls and settings, providing vital functionality tailored to users with specific roles. Only users assigned the 'admin' or 'callrouter' roles possess permission to access the dashboard. This distinction allows organizations to delegate call management responsibilities without granting full administrative access, thus enhancing both security and operational efficiency.
On the other hand, administrative pages such as the CallRouter setup page are strictly reserved for users with the 'admin' role. This restriction is crucial as these pages often contain sensitive settings and configuration options that could impact the overall functionality of the plugin and the website. By assigning these permissions wisely, the CallRouter plugin ensures that users can only access data and functions commensurate with their role, maintaining a balance of usability and security.
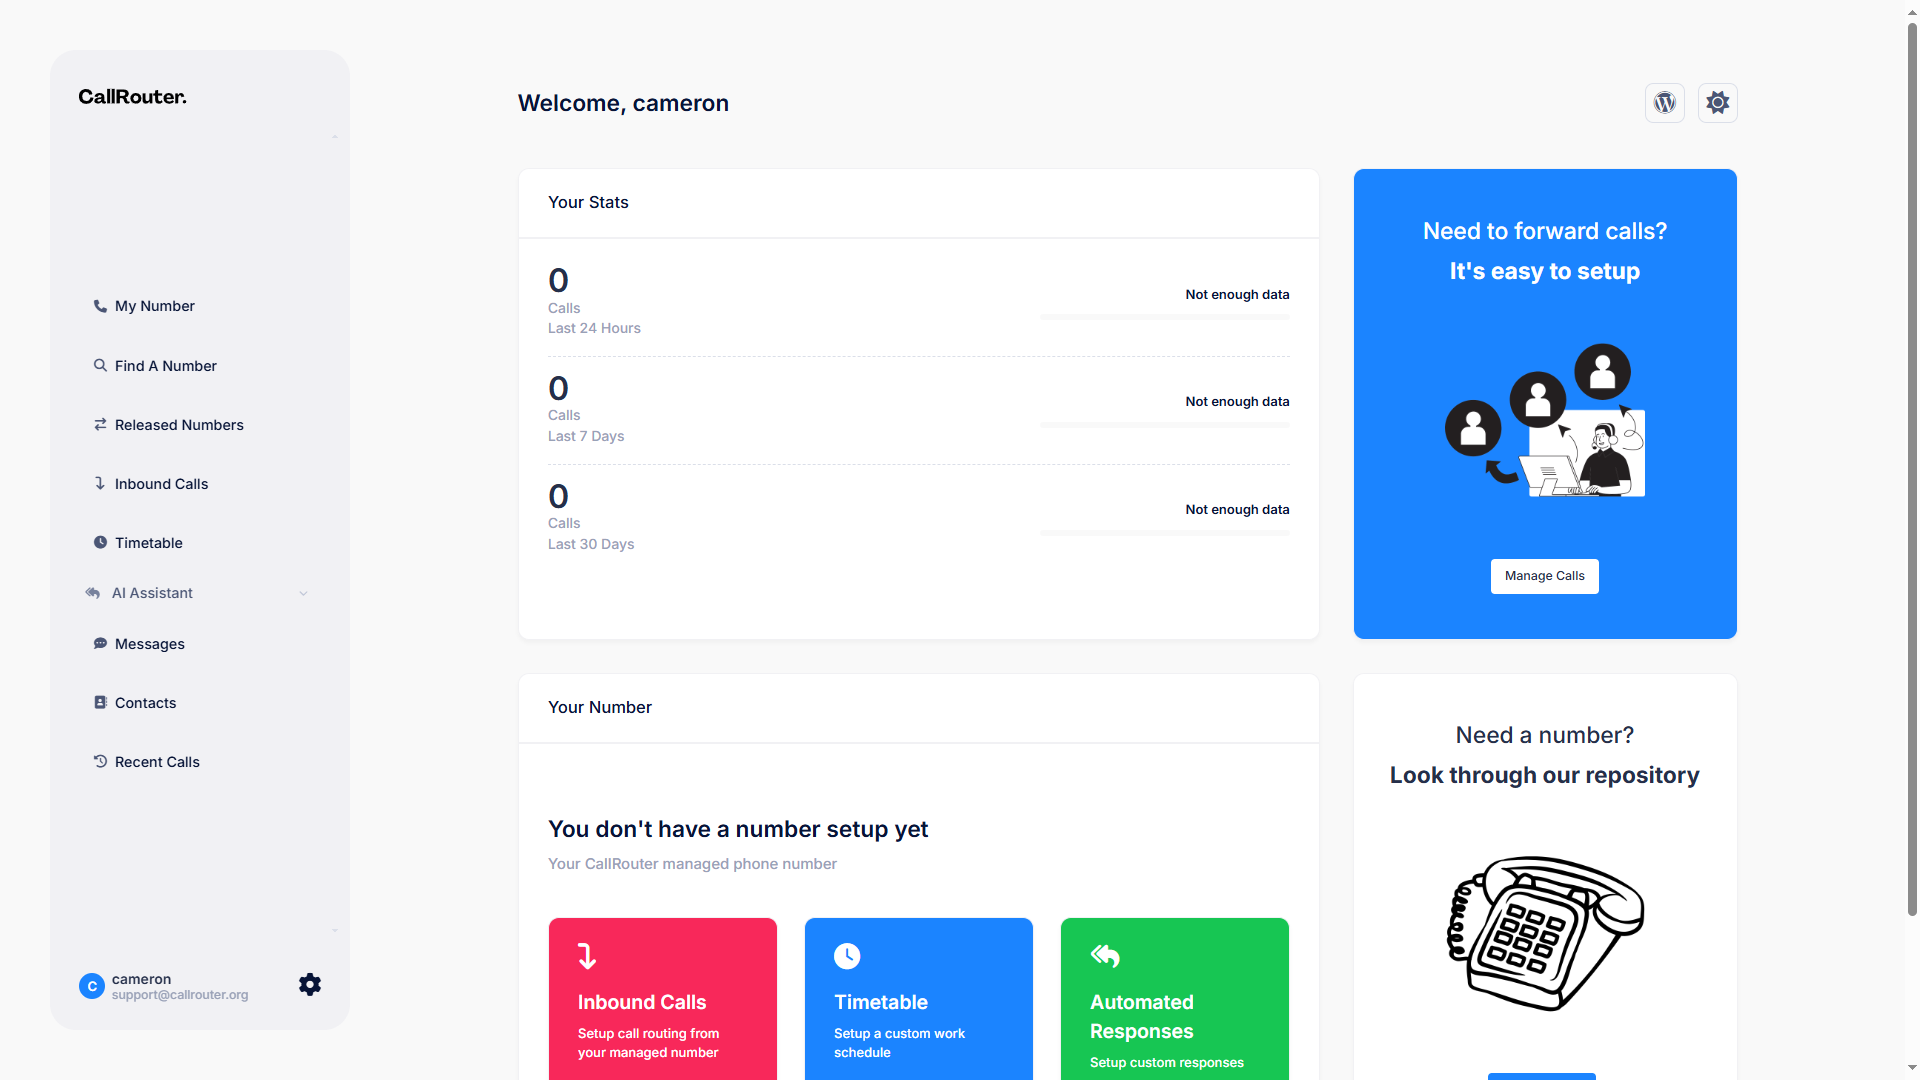
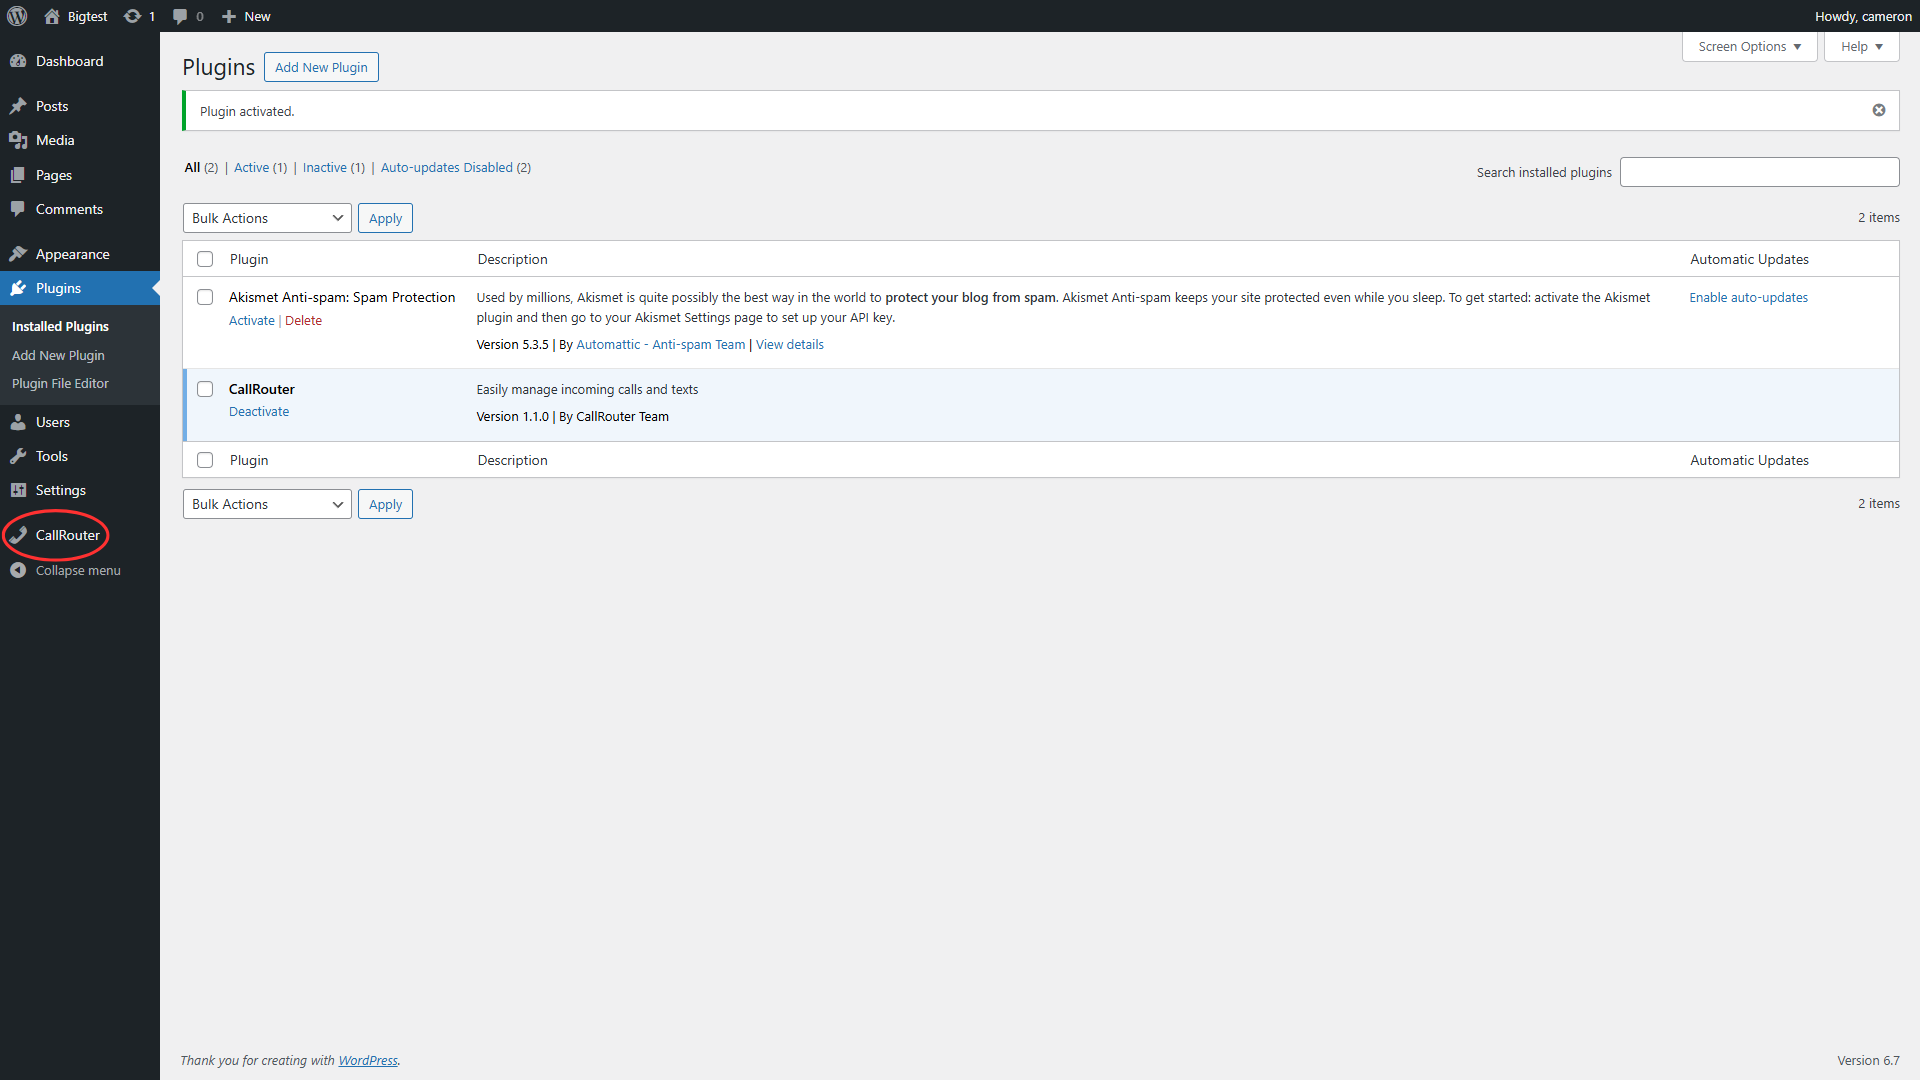
To access the dashboard simply click on the CallRouter plugin and you will be automatically redirected to the dashboard.
Below is what the CallRouter dashboard looks like.
